数据采样
为满足训练需求,解决诸如数据集过大或样本类别分布不均等问题,MindSpore提供了多种不同用途的采样器(Sampler),帮助用户对数据集进行不同形式的采样。用户只需在加载数据集时传入采样器对象,即可实现数据的采样。
MindSpore目前提供了如RandomSampler、WeightedRandomSampler、SubsetRandomSampler等多种采样器。此外,用户也可以根据需要实现自定义的采样器类。
更多采样器的使用方法参见采样器API文档。
采样器
下面主要以CIFAR-10数据集为例,介绍几种常用MindSpore采样器的使用方法。

在介绍采样器之前,我们首先把示例中用到的数据集下载下来,并解压到指定位置。
本章节中的示例代码依赖
matplotlib和download,可使用命令pip install matplotlib和pip install download安装。如本文档以Notebook运行时,完成安装后需要重启kernel才能执行后续代码。
[1]:
from download import download

url = "https://mindspore-website.obs.cn-north-4.myhuaweicloud.com/notebook/datasets/cifar-10-binary.tar.gz"

download(url, "./", kind="tar.gz", replace=True)
Downloading data from https://mindspore-website.obs.cn-north-4.myhuaweicloud.com/notebook/datasets/cifar-10-binary.tar.gz (162.2 MB)

file_sizes: 100%|████████████████████████████| 170M/170M [00:26<00:00, 6.35MB/s]
Extracting tar.gz file...
Successfully downloaded / unzipped to ./
解压后数据集文件的目录结构如下:
.
└── cifar-10-batches-bin
    ├── batches.meta.txt
    ├── data_batch_1.bin
    ├── data_batch_2.bin
    ├── data_batch_3.bin
    ├── data_batch_4.bin
    ├── data_batch_5.bin
    ├── readme.html
    └── test_batch.bin
RandomSampler
从索引序列中随机采样指定数目的数据。
下面的样例使用随机采样器,分别从数据集中有放回和无放回地随机采样5个数据,并打印展示。为了便于观察有放回与无放回的效果,这里自定义了一个数据量较小的数据集。
[2]:
from mindspore.dataset import RandomSampler, NumpySlicesDataset

np_data = [1, 2, 3, 4, 5, 6, 7, 8]  # 数据集

# 定义有放回采样器,采样5条数据
sampler1 = RandomSampler(replacement=True, num_samples=5)
dataset1 = NumpySlicesDataset(np_data, column_names=["data"], sampler=sampler1)

print("With Replacement:    ", end='')
for data in dataset1.create_tuple_iterator(output_numpy=True):
    print(data[0], end=' ')

# 定义无放回采样器,采样5条数据
sampler2 = RandomSampler(replacement=False, num_samples=5)
dataset2 = NumpySlicesDataset(np_data, column_names=["data"], sampler=sampler2)

print("\nWithout Replacement: ", end='')
for data in dataset2.create_tuple_iterator(output_numpy=True):
    print(data[0], end=' ')
With Replacement:    5 7 1 7 7
Without Replacement: 1 5 7 2 4
从上面的打印结果可以看出,使用有放回采样器时,同一条数据可能会被多次获取;使用无放回采样器时,同一条数据只能被获取一次。
WeightedRandomSampler
指定长度为N的采样概率列表,按照概率在前N个样本中随机采样指定数目的数据。
下面的样例使用带权随机采样器从CIFAR-10数据集的前10个样本中按概率获取6个样本,并展示已读取数据的形状和标签。
[3]:
import math
import matplotlib.pyplot as plt
from mindspore.dataset import WeightedRandomSampler, Cifar10Dataset
%matplotlib inline

DATA_DIR = "./cifar-10-batches-bin/"

# 指定前10个样本的采样概率并进行采样
weights = [0.8, 0.5, 0, 0, 0, 0, 0, 0, 0, 0]
sampler = WeightedRandomSampler(weights, num_samples=6)
dataset = Cifar10Dataset(DATA_DIR, sampler=sampler)  # 加载数据

def plt_result(dataset, row):
    """显示采样结果"""
    num = 1
    for data in dataset.create_dict_iterator(output_numpy=True):
        print("Image shape:", data['image'].shape, ", Label:", data['label'])
        plt.subplot(row, math.ceil(dataset.get_dataset_size() / row), num)
        image = data['image']
        plt.imshow(image, interpolation="None")
        num += 1

plt_result(dataset, 2)
Image shape: (32, 32, 3) , Label: 6
Image shape: (32, 32, 3) , Label: 6
Image shape: (32, 32, 3) , Label: 6
Image shape: (32, 32, 3) , Label: 9
Image shape: (32, 32, 3) , Label: 9
Image shape: (32, 32, 3) , Label: 9

从上面的打印结果可以看出,本次在前面一共10个样本中随机采样了6条数据,只有前面两个采样概率不为0的样本才有机会被采样。
SubsetRandomSampler
从指定样本索引子序列中随机采样指定数目的样本数据。
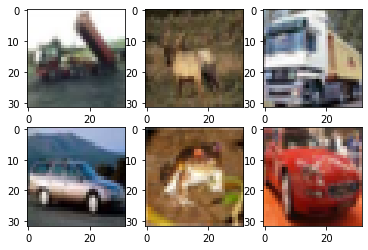
下面的样例使用子序列随机采样器从CIFAR-10数据集的指定子序列中抽样3个样本,并展示已读取数据的形状和标签。
[4]:
from mindspore.dataset import SubsetRandomSampler

# 指定样本索引序列
indices = [0, 1, 2, 3, 4, 5, 6, 7, 8, 9]
sampler = SubsetRandomSampler(indices, num_samples=6)
# 加载数据
dataset = Cifar10Dataset(DATA_DIR, sampler=sampler)

plt_result(dataset, 2)
Image shape: (32, 32, 3) , Label: 9
Image shape: (32, 32, 3) , Label: 4
Image shape: (32, 32, 3) , Label: 9
Image shape: (32, 32, 3) , Label: 1
Image shape: (32, 32, 3) , Label: 6
Image shape: (32, 32, 3) , Label: 1

从上面的打印结果可以看到,采样器从索引序列中随机采样了6个样本。
PKSampler
在指定的数据集类别P中,每种类别各采样K条数据。
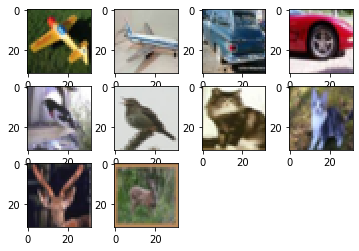
下面的样例使用PK采样器从CIFAR-10数据集中每种类别抽样2个样本,最多20个样本,并展示已读取数据的形状和标签。
[5]:
from mindspore.dataset import PKSampler

# 每种类别抽样2个样本,最多10个样本
sampler = PKSampler(num_val=2, class_column='label', num_samples=10)
dataset = Cifar10Dataset(DATA_DIR, sampler=sampler)

plt_result(dataset, 3)
Image shape: (32, 32, 3) , Label: 0
Image shape: (32, 32, 3) , Label: 0
Image shape: (32, 32, 3) , Label: 1
Image shape: (32, 32, 3) , Label: 1
Image shape: (32, 32, 3) , Label: 2
Image shape: (32, 32, 3) , Label: 2
Image shape: (32, 32, 3) , Label: 3
Image shape: (32, 32, 3) , Label: 3
Image shape: (32, 32, 3) , Label: 4
Image shape: (32, 32, 3) , Label: 4

从上面的打印结果可以看出,采样器对数据集中的每种标签都采样了2个样本,一共10个样本。
DistributedSampler
在分布式训练中,对数据集分片进行采样。
下面的样例使用分布式采样器将构建的数据集分为4片,在分片抽取一个样本,共中采样3个样本,并展示已读取的数据。
[6]:
from mindspore.dataset import DistributedSampler

# 自定义数据集
data_source = [0, 1, 2, 3, 4, 5, 6, 7, 8, 9, 10, 11]

# 构建的数据集分为4片,共采样3个数据样本
sampler = DistributedSampler(num_shards=4, shard_id=0, shuffle=False, num_samples=3)
dataset = NumpySlicesDataset(data_source, column_names=["data"], sampler=sampler)

# 打印数据集
for data in dataset.create_dict_iterator():
    print(data)
{'data': Tensor(shape=[], dtype=Int64, value= 0)}
{'data': Tensor(shape=[], dtype=Int64, value= 4)}
{'data': Tensor(shape=[], dtype=Int64, value= 8)}
从上面的打印结果可以看出,数据集被分成了4片,每片有3个样本,本次获取的是id为0的片中的样本。
自定义采样器
用户可以自定义采样器,并把它应用到数据集上。
__iter__ 模式
用户可以继承Sampler基类,通过实现__iter__方法来自定义采样器的采样方式。
下面的样例定义了一个从下标0至下标9间隔为2采样的采样器,将其作用于自定义数据集,并展示已读取数据。
[7]:
import mindspore.dataset as ds

# 自定义采样器
class MySampler(ds.Sampler):
    def __iter__(self):
        for i in range(0, 10, 2):
            yield i

# 自定义数据集
np_data = ['a', 'b', 'c', 'd', 'e', 'f', 'g', 'h', 'i', 'j', 'k', 'l']

# 加载数据
sampler = ds.IterSampler(sampler=MySampler())
dataset = ds.NumpySlicesDataset(np_data, column_names=["data"], sampler=sampler)

for data in dataset.create_tuple_iterator(output_numpy=True):
    print(data[0], end=' ')
a c e g i
从上面的打印可以看出,自定义的采样器读取了下标为0、2、4、6、8的样本数据,这与自定义采样器的采样目的一致。
__getitem__ 模式
用户可以定义一个采样器类,该类包含 __init__ 、 __getitem__ 和 __len__ 方法。
下面的样例定义了一个下标为 [3, 4, 3, 2, 0, 11, 5, 5, 5, 9, 1, 11, 11, 11, 11, 8] 的采样器类,将其作用于自定义数据集,并展示已读取数据。
[8]:
import mindspore.dataset as ds

# 自定义采样器
class MySampler():
    def __init__(self):
        self.index_ids = [3, 4, 3, 2, 0, 11, 5, 5, 5, 9, 1, 11, 11, 11, 11, 8]
    def __getitem__(self, index):
        return self.index_ids[index]
    def __len__(self):
        return len(self.index_ids)

# 自定义数据集
np_data = ['a', 'b', 'c', 'd', 'e', 'f', 'g', 'h', 'i', 'j', 'k', 'l']

# 加载数据
dataset = ds.NumpySlicesDataset(np_data, column_names=["data"], sampler=MySampler())
for data in dataset.create_tuple_iterator(output_numpy=True):
    print(data[0], end=' ')
d e d c a l f f f j b l
从上面的打印可以看出,自定义的采样器读取了下标为 [3, 4, 3, 2, 0, 11, 5, 5, 5, 9, 1, 11, 11, 11, 11, 8] 的样本数据,这与自定义采样器的采样目的一致。


